Olympus introduced the Olympus Workspace V1.0, its new image management and post-processing software, as a replacement for the aging Olympus Viewer 3 (OV3), together with the recent launch of the new Olympus OM-D E-M1X system camera. The system is deemed packed with features that meet the demands of pro photographers, supports various styles of photography workflows, including a screen layout that supports various styles of photography workflows (as compared to the previous OV3), and a high-speed RAW preview.
While the official launch date for the software is March 1, 2019, the software, V1.0, is already available for download and installation, as I have done, from the link here.
You need to log in to your camera's serial number in the box provided to be able to download the program and select between the three options available - Windows 32-bit, Windows 64-bit, or macOS.
Olympus Workspace - Free Image Editing Software!
Olympus Workspace is a free image editing software for Olympus users. You should try it! Olympus Workspace: https://support.olympus-imaging.com/owdownload firmware: :https://cs.olympus-imaging.jp/en/support/imsg/digicamera/download/software/firm/e1/ I make all my content with Olympus gear. I am an Olympus Visionary. Links to my Olympus gear (disclaimer: using this link when doing purchases, you support this channel.
The download and installation were as easy and fast as earlier Olympus Viewer versions. I did not have any problems here; the download and installation went smoothly, and the system was up and running in no time.
Registration
Registration for the software is not mandatory, and you can do it without it. Just click on the 'Register Later' checkbox to proceed.
The Interface
The first thing that strikes me most about the Olympus Workspace is the all-black interface, which to me is rather disturbing, something which I do not fancy at all.
Not many choices here. The only thing you can change is the background color of the Thumbnail and View areas with a range of five shades, the lightest (gray), as selected, while the others are darker tones, which ends up with the original black setup.
This setup change is done by accessing the Settings icon, located on the top right corner of the Interface, selecting Display on the Item menu, and picking the color from the background color dropdown menu. Click OK to implement the selection.
Database Location
My preference for working is to have both the image and post-processing data located or placed as close together, in the same vicinity on the hard disk. This will help me get better organized with the images and data for backup and other maintenance procedures.
Setting the database location was actually an atrocious affair on the OV3. I did manage to get it once, but I could not really remember how it was done.
With the Olympus Workspace, however, things were silky smooth, and I had it done without a hitch. Access to the setup is by accessing the Settings icon, Basic option, and typing in the location where you want the database to be.
I also went with the idea of using the directory where the database is located to house all my imported image files as well. These are subdivided into directories based on the camera I use, the lens mounted, and the date of the shoot.
The Edit Palette
Different from the OV3, the Edit palette of the Workspace comes with only a single tab, and specific edit functions may be available for use on both *.JPEG and *.ORF image files. Options for these functions, however, may differ.
Exposure Compensation values, for example, are by .1 EV to a maximum of +2EV or -2EV for *.ORF files, and by an increment of 1 to 100 or -100 for *.JPEG images.
Art Filter edit is now available for both *.JPEG and *.ORF image edits.
Options that are not available for either of the image edits, for example, Adjust Color, are not available for *.ORF image files edit. The menu item is grayed out and is not accessible.
Organizing the Favorites Tab
While my basic workflow in OV3 revolves around the functions of Auto Tone Correction, Tone Curve, Brightness & Contrast, and Unsharp Mask, these menu items are not fully available in Olympus Workshop.
It seems that Auto Tone Correction is now Gradation, and while the Tone Curve edit is still there, Brightness & Contrast may now be replaced by Clarity, Dehaze, and Contrast. Unsharp Mask is still available as per Olympus Viewer 3.
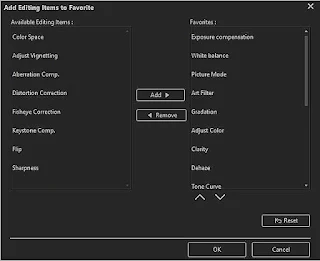
A good way to access this menu item is to have it organized in the Favorites tab. Available menu items can be added or subtracted by using the Customize Palette option, where the vertical arrangements of these menu items can be done equally easily.
Early Edits
A couple of early images were post-processed with the new Olympus Workspace installation.
Above is an older *.JPEG image, which I was trying to replicate as much as what was done earlier on the OV3.
The result is what I term as 'near enough', meaning that I will need to spend more time to get the best out of the software.
Below is a newer *.ORF file and is the first edit. Both images were shot on the Pen E-P5.
My post-processing workflow also includes the use of Google NIK Sharpener Pro3 for print sharpening.
Instruction Manual
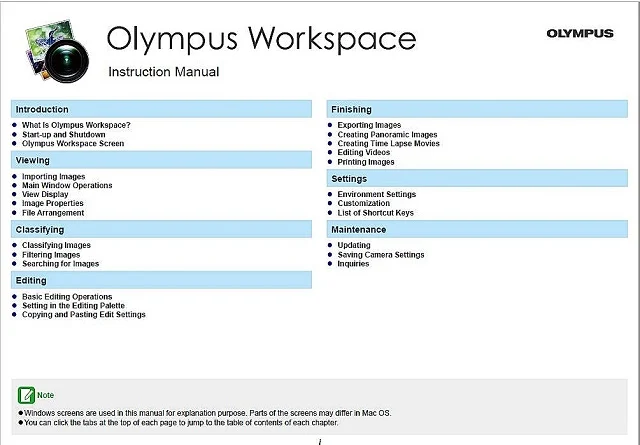
Unlike OV3, which does not come with any help, Olympus Workspace does come with an online Instruction Manual accessed by the (?) tab on the lineup at the top right corner of the page.
My experience as an early adopter, however, was to realize that the Help file system was not installed on the first download and installation of the software, but rather as an update once you complete the first installation.
Do the update by going to the Help tab and clicking on the 'Update Software' option, and following the instructions as directed.
Next - Editing Film-Scan JPEG Images
Vintage Camera Marketplace by ImagingPixel
and camera add-ons. Follow ImagingPixel on Facebook, Pinterest, and Twitter.


No comments:
Post a Comment